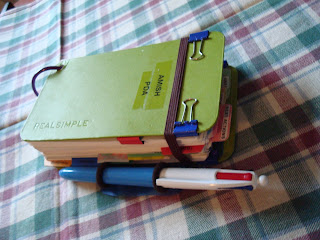
I love gadgets and electronic toys. I used to have a Palm Pilot, and I had great fun playing with it. It was not very useful to me as a productivity tool, however. There is something about pen and paper that is more immediate. When I need to write something down, it is easier and faster to download my brain onto a piece of paper than an electronic device. And it is easier to flip through the pages and see what I need to see. So I decided to build my own PDA, and I call it an Amish PDA, because it does not use the latest technology. [I'm planning to add a picture to the cover ~ a small graphic, showing two Amish people kissing. (Get it?)] The technology I used is no more complicated than it needs to be.
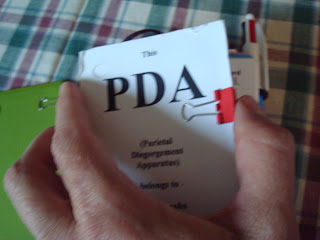
PDA, in this case, stands for "Parietal Disgorgement Apparatus." It is a tool for getting things out of your head, especially things like "what I'm supposed to do today." I'm a big fan of David Allen and Merlin Mann, and other productivity gurus. Most of my ideas for my PDA came from other geniuses. I steal a lot of ideas from the internet. I have spent a lot of time looking at pictures of other people's planners and systems. I love this stuff. "Office porn." (If this were truly an Amish PDA, it would say things like "milk the cows," and "make bread," and "finish the quilt.")
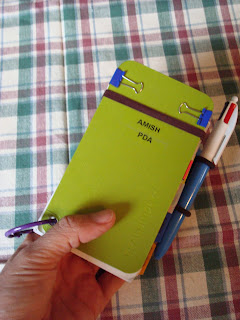
Here is how I built my PDA. The cover is from a thing I bought at Target ~ a "Real Simple" 3x5 card wheel. It has a hole drilled in one corner, and there was a bolt that I had to unscrew. I took out all the 3x5 cards, and I'm using a hinged metal ring instead ~ much easier to open and close, so I can take cards out and put cards in. I like this cover, because it has an elastic loop attached, to hold my PDA together when I'm not using it. I tried using it with the hole at the top, but have found it works better for me to have the hole at the bottom left corner.
I made some of my pages using Microsoft Word, and stole some of them from DIYplanner.com. I print them directly onto 3x5 cards using my printer.
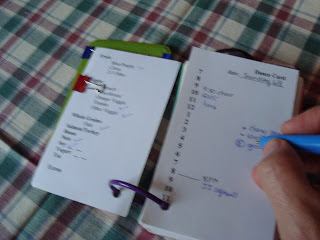
The page I look at most is my daily "Dance Card." It has the hours of the day in a column on the left edge, from 7am to 11pm. This is where I write any time-specific commitments. If there are things I want to get done that day, but not at any certain time, I can jot them on the right side of the page. This page has my "marching orders" for the day, or my "roadmap" through the day ~ but I decided I don't like any of those metaphors. Most days, I'm just not a fighter, so "marching orders" sounded too military. And some days are not like a journey through physical space, so the "map" idea didn't inspire me. But a dance card! I like that. These things are not appointments or things to do ~ they are things that want to dance with me if I choose. I am popular! I am the belle of the ball! (Don't laugh ~ it works for me, and I have been known to get a lot done in a day!)
On the opposite page from the dance card is my list of SuperFoods. This is a list of foods that I want to make sure I eat almost every day, if possible. It is inspired by the book SuperFoodsRx: 14 Foods That Will Change Your Life, by Pratt and Matthews. When I eat these foods every day, I have a lot of energy, and am not hungry for junk food. It helps to have a checklist, so I don't have to think too hard about what to eat. I just check off each food as I eat it, and try to get it all checked off each day, if I can. It is not necessary to count calories or points, or follow a complicated diet plan.
I have the planner divided into different sections. There are weekly and monthly calendar pages, and a section for my GTD "Next Actions," a section for each of my two jobs, and a financial section. I keep some blank index cards in a section labeled "Potentiality."
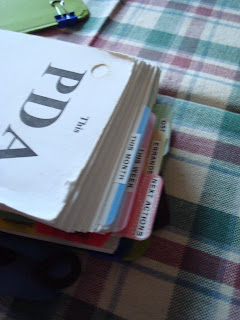 For divider pages, I used plastic dividers originally intended for a 3x5 card file. I trimmed them slightly, and used a labeler to label the tabs. I also use durable tabs (labeled with my label maker) for pages I turn to frequently (like my next actions, and my errands, and a few other things.)
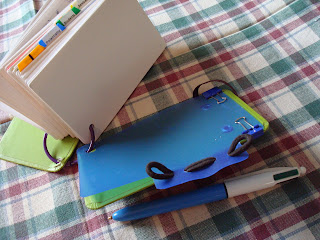 Teeny-tiny binder clips are wonderful for clipping pages together, or holding a loose sheet of paper, or whatnot.
I also decided I needed a pen loop, so that my four-color pen would always be handy. For that, I cut out a piece from a plastic folder and clipped it to the back cover so that part of it would stick out the side. I punched four holes in that part, and threaded a hair elastic thingy through that. It is perfect for holding my pen.


